Adding a Disclaimer
Before you can add a disclaimer, you will need to set up a group and a role (if these are already set up you can skip this step).
Adding a new group
- Hover over the Legal tab at the top.
- Select Disclaimer groups from the drop down menu

You will then need to enter details to add the group. The fields are:
Name This is the name of the group.
SlugThis will generate automatically from the name and will appear in the URL to show you the path of the page.
ParentYou have the option to nest your groups within other groups.
Hide from public listsYou can choose whether to make your group public or not.
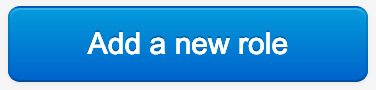
Adding a new role
- Hover over the Users tab at the top.
- Select Roles from the drop down menu
You will then need to enter details to add the group. The fields are:
Name This is the name of the role.
ParentYou have the option to nest your groups within other groups, although this time you will need to select Everyone as the parent to allow your new role to inherit all roles.
Now that you have set up a new role and a new group you can add the disclaimer.
New disclaimer
- Hover over the Legal tab at the top.
- Select Disclaimers from the drop down menu

You will then be presented with the following fields:
Admin reference A name for the disclaimer that only administrators and editors will see.
NameThis is the name of the disclaimer that anyone can see on your website.
GroupSelect a group.
Type You can choose between the following:
Accept/Decline
Login
Multiple Choice
Custom Form
You will mainly use either Accept/Decline or Login.
Role(s) to assign on acceptYou need to tick the role that you would like to give people who have accepted.
Permanently add roles to logged in userLeave this un-ticked.
LayoutUse the same layout as the page you are adding the disclaimer to.
TemplateChoose Disclaimer Default View.
ExpirationLeave this field.
Keep AliveLeave this field.
Redirect people with permission toYou would need to select the page that you would like the disclaimer to be on.
Redirect people without permission toYou need to select Referer.
Once you have filled in all the information the disclaimer is ready to be saved. Click Save on the right-hand-side of the page.
Editing the disclaimer
Once you have saved your Disclaimer, you will now be given more options. This is where you will be able to add your content for the Disclaimer.
You add content to this the same way as you would a page.
Adding the disclaimer to the page
Now that it has been set up, you need to set the page to redirect to the disclaimer.
- Hover over the Content tab at the top
- Select Pages from the drop down menu
- Select the page
- Click on the Permissions tab

You can see that this tab is set out in two sections:
AllowYou can control who you want to view this page.
You will see that the page is set to have a default permission of everyone.
You can remove this by clicking on the X.
DenyYou can control who you do not want to have access to the page.
This is blank by default.
To add a new Permission in Allow you will need to click on:
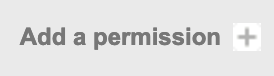
You will then need to click through to your newly created role (Role > Everyone > New Role)
Now you have given the correct permissions to the page you need to set up Redirect people without permission to
- Select Legal Disclaimer from the list
- Select your disclaimer from the drop down list
This will now redirect people back to the disclaimer page if they choose to not accept.
Click Save on the right-hand-side of the page.